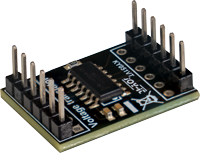
KY-051 Voltage Translator / Level Shifter
This level shifter converts digital signals from one voltage to another up or down. There are 4 available channels that can be converted.
- Arduino
- Raspberry Pi
- Raspberry Pi Pico
- Micro:Bit
The voltage translator or level shifter converts digital signals from one voltage to another, either up or down. This module offers a total of four channels on which the voltage conversions can be carried out.
In today's world, microcontroller systems operate in different voltage ranges. Older systems such as Arduino, which are based on an Atmega controller, use 5V signals. Newer devices such as the Raspberry Pi, which is based on an ARM controller, work with 3.3V signals.
If communication between two systems with different voltage levels is required, the voltage level must be adjusted, i.e. "shifted". Without this adjustment, the excess voltage could cause damage to the more sensitive, low-voltage devices.
The level shifter enables safe and efficient communication between devices with different voltage requirements, protecting the hardware from potential damage caused by incompatible voltage levels. This is particularly important in projects that integrate different microcontrollers and sensors to ensure smooth and safe operation.
Pin assignment
The pin assignment is printed on the module board.
The signals at the inputs/outputs A1-A4 and B1-B4 are shifted to the respective voltage level (VCCa -> A1-A4 | VCCb -> B1-B4).
Example:
Arduino output -> Digital [ON] = 5 V @ B1 >>>>>>> 3.3 V @ A1 -> Raspberry Pi input
No additional software or code is required for operation; the module works autonomously.
Please note that VCCb must be greater than/equal to VCCa (example VCCb=5 V - VCCa=3.3 V)

Example of connection between Arduino and Raspberry Pi:
| Arduino | Sensor |
|---|---|
| 5 V | Vccb |
| Pin 3 | B1 |
| Pin 4 | B2 |
| Pin 5 | B3 |
| Pin 6 | B4 |
| GND | GND |
| Raspberry Pi | Sensor |
|---|---|
| 3,3 V [Pin 1] | Vcca |
| GPIO 18 [Pin 12] | A1 |
| GPIO 3 / SCL [Pin 5] | A2 |
| GPIO 2 / SDA [Pin 3] | A3 |
| GPIO 11 [Pin 8] | A4 |
| GND [Pin 6] | GND |
Please make sure that both systems are connected via the same ground connection (GND) - OE does not need to be connected for this module.
The voltage translator or level shifter converts digital signals from one voltage to another, either up or down. This module offers a total of four channels on which the voltage conversions can be carried out.
In today's world, microcontroller systems operate in different voltage ranges. Older systems such as Arduino, which are based on an Atmega controller, use 5V signals. Newer devices such as the Raspberry Pi, which is based on an ARM controller, work with 3.3V signals.
If communication between two systems with different voltage levels is required, the voltage level must be adjusted, i.e. "shifted". Without this adjustment, the excess voltage could cause damage to the more sensitive, low-voltage devices.
The level shifter enables safe and efficient communication between devices with different voltage requirements, protecting the hardware from potential damage caused by incompatible voltage levels. This is particularly important in projects that integrate different microcontrollers and sensors to ensure smooth and safe operation.
Pin assignment
The pin assignment is printed on the module board.
The signals at the inputs/outputs A1-A4 and B1-B4 are shifted to the respective voltage level (VCCa -> A1-A4 | VCCb -> B1-B4).
Example:
Arduino output -> Digital [ON] = 5 V @ B1 >>>>>>> 3.3 V @ A1 -> Raspberry Pi input
No additional software or code is required for operation; the module works autonomously.
Please note that VCCb must be greater than/equal to VCCa (example VCCb=5 V - VCCa=3.3 V)
Example of connection between Arduino and Micro:Bit:
| Arduino | Sensor |
|---|---|
| 5 V | Vccb |
| Pin 3 | B1 |
| Pin 4 | B2 |
| Pin 5 | B3 |
| Pin 6 | B4 |
| GND | GND |
| Micro:Bit | Sensor |
|---|---|
| 3,3 V [Pin 3V] | Vcca |
| P0 [Pin 0] | A1 |
| P1 [Pin 1] | A2 |
| P2 [Pin 2] | A3 |
| P8 [Pin 8] | A4 |
| GND [Pin GND] | GND |
Please make sure that both systems are connected via the same ground connection (GND) - OE does not need to be connected for this module.
The voltage translator or level shifter converts digital signals from one voltage to another, either up or down. This module offers a total of four channels on which the voltage conversions can be carried out.
In today's world, microcontroller systems operate in different voltage ranges. Older systems such as Arduino, which are based on an Atmega controller, use 5V signals. Newer devices such as the Raspberry Pi, which is based on an ARM controller, work with 3.3V signals.
If communication between two systems with different voltage levels is required, the voltage level must be adjusted, i.e. "shifted". Without this adjustment, the excess voltage could cause damage to the more sensitive, low-voltage devices.
The level shifter enables safe and efficient communication between devices with different voltage requirements, protecting the hardware from potential damage caused by incompatible voltage levels. This is particularly important in projects that integrate different microcontrollers and sensors to ensure smooth and safe operation.
Pin assignment
The pin assignment is printed on the module board.
The signals at the inputs/outputs A1-A4 and B1-B4 are shifted to the respective voltage level (VCCa -> A1-A4 | VCCb -> B1-B4).
Example:
Arduino output -> Digital [ON] = 5 V @ B1 >>>>>>> 3.3 V @ A1 -> Raspberry Pi Pico input
No additional software or code is required for operation; the module works autonomously.
Please note that VCCb must be greater than/equal to VCCa (example VCCb=5 V - VCCa=3.3 V)
Example connection assignment between Arduino and Raspberry Pi Pico:
| Arduino | Sensor |
|---|---|
| 5 V | Vccb |
| Pin 3 | B1 |
| Pin 4 | B2 |
| Pin 5 | B3 |
| Pin 6 | B4 |
| GND | GND |
| Raspberry Pi Pico | Sensor |
|---|---|
| 3,3 V | Vcca |
| GPIO0 | A1 |
| GPIO1 | A2 |
| GPIO2 | A3 |
| GPIO3 | A4 |
| GND | GND |
Please make sure that both systems are connected via the same ground connection (GND) - OE does not need to be connected for this module.